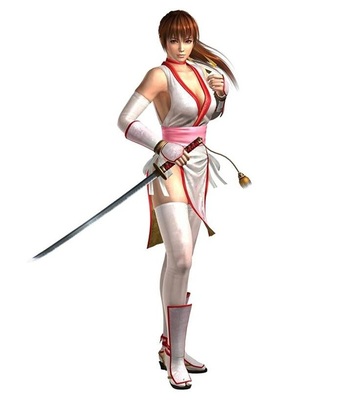
 I was pretty excited when Kasumi was announced as a playable character in Ninja Gaiden Razor's Edge, so I figured I'd attempt a costume. Chose the white because.. well.. I like white.
I thought it'd be a reallyyyyy easy costume, but sadly I was wrong as usual. I had to re-do the top once because the initial draft I came up with wasn't form-fitting enough and kept gaping open lol. In the end I took it apart and cut it like a swimsuit, moving the front darts to the side ish for more support, all the while very thankful that I chose a fabric with a bit of stretch. While looking for fabrics, I found this uber pretty, textured red idk-what-fabric. It was embossed with red peonies and was so pretty and everything and I just HAD to have it for the costume. So I bought it and regretted it forever lol. It was really soft and flowy and just went every damn where, ironing it was a nightmare, trying to wrangle it into a bias was a nightmare, prewashing it was a nightmare, it was just disgusting. In the end I pushed a light fusible interfacing onto it and managed to sew it on, VERY SLOWLY.
..Okay, so the costume wasn't like insanely difficult or anything, but I was just really annoyed because it turned out to be more work than I initially expected lol.
I also made the long gloves and leggings from spandex, the pink wrap-around sash from a heavy jersey, and the arm and shin guards from craft foam covered in heavy cotton. The bracelets were sewn from gold pleather and attached to the arm guards, with velcro closures.
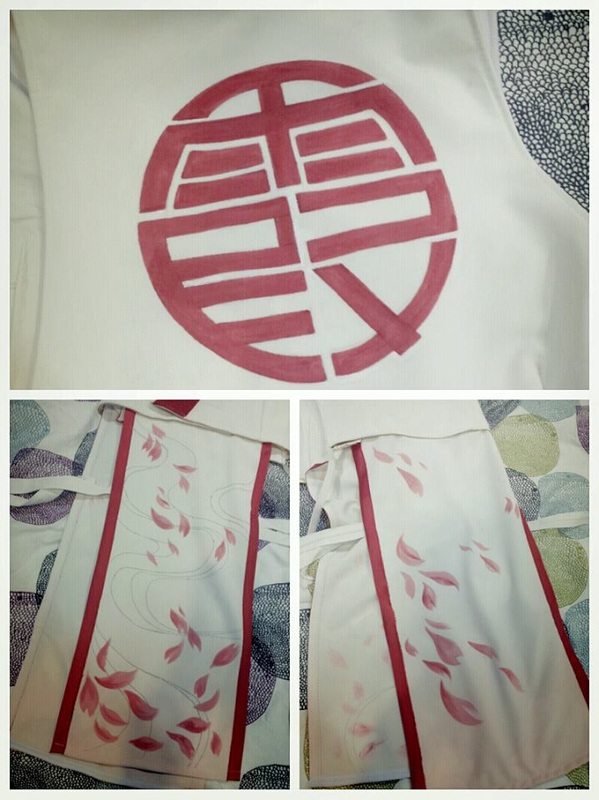
I hand dyed the pink gradient onto the front and back panels, and also hand painted the falling cherry blossoms and KASUMI motif on the back of the top. I enjoy painting stuff so it was really therapeutic. Bound the panels in a broad red bias binding of the same shade because I couldn't bear the thought of wrestling around with that horrid fabric from hell again. ;_;  Besides her short sword, I also prepared a set of fuuma shuriken, the personalized projectile weapon that she uses in Razor's Edge. I made the individual blades from plastic and foam, with metallic card stock for the blade edges. They combine to form a super lightweight foldable prop.
 This cosplay is taking way too long to complete. School term's started, and besides coursework and the other little technicalities of life, I'm spending most of my free time gaming or exercising to blow off steam. Which leaves me with an hour or two each night, should I actually feel like working on anything cosplay-related lol.
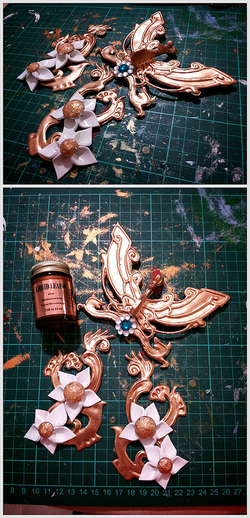
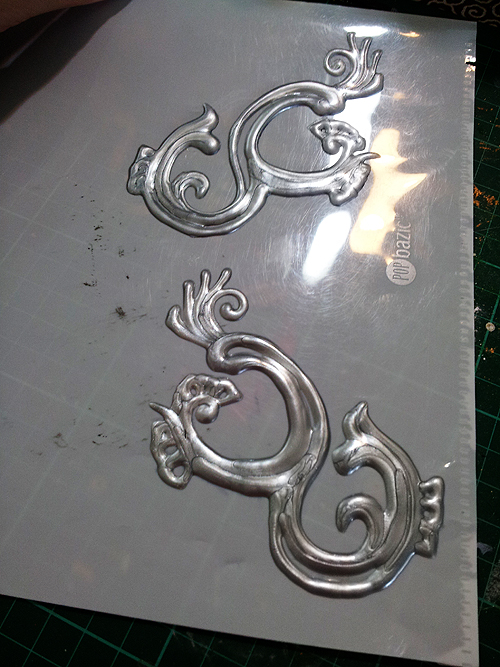
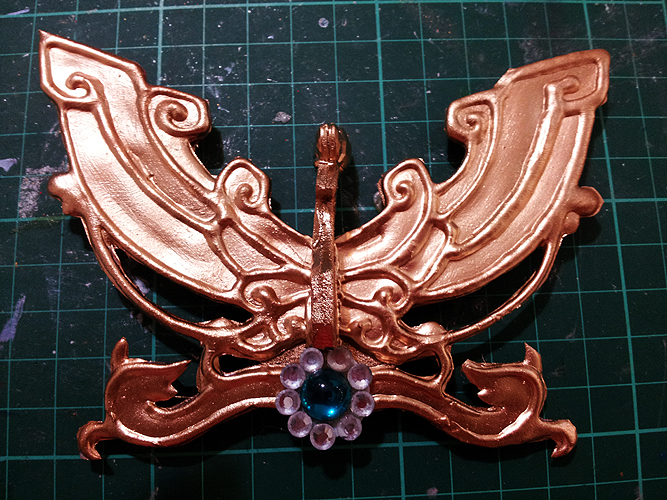
Decided to try something different with the headpiece, instead of the usual craft foam. These are made almost entirely from 3D puffy paint, which I hoped would look more like metalwork and less like, well, craft foam.
It's a really simple process. I sketched out the pieces on a piece of paper and traced them onto a clear file. I then went over it with puffy paint. The stuff kind of like sinks and spreads out, so it created a nice raised surface with rounded edges, unlike the boxy sharp edges that craft foam would give, if that makes sense. After the first layer dried, I went over with another layer, and then after that dried and set, the raised details were drawn on in thin lines.
If I'd embedded thin wire in the paint, I could have just peeled off the pieces and used them as they were, but alas I didn't, so instead I cut them out with a craft knife together with the plastic file.
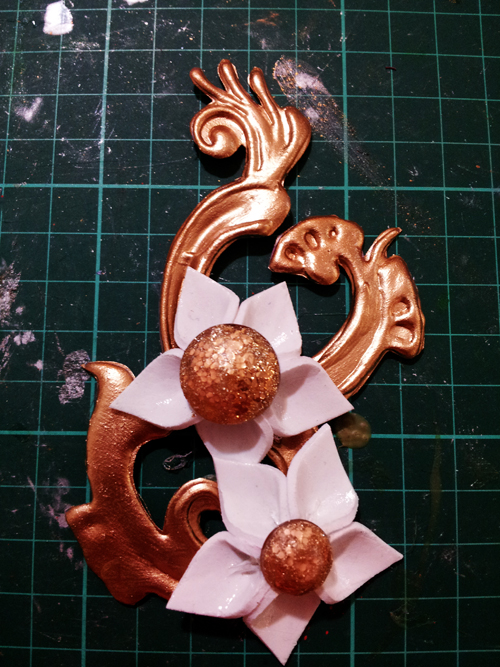
The main piece aka that birdlike thing needed extra reinforcement, so I cut a length of stiff wire, bent it into shape, and glued it to the back, adding a copious layer of hotglue over it to conceal it. The body of the bird (that just sounds so weird, Idek) was cut from two layers of craft foam and then glued onto the wings.
These are just going to be glued onto a thin hairband so they can be worn easily. I should probably get started on the costume itself soon. LOL.
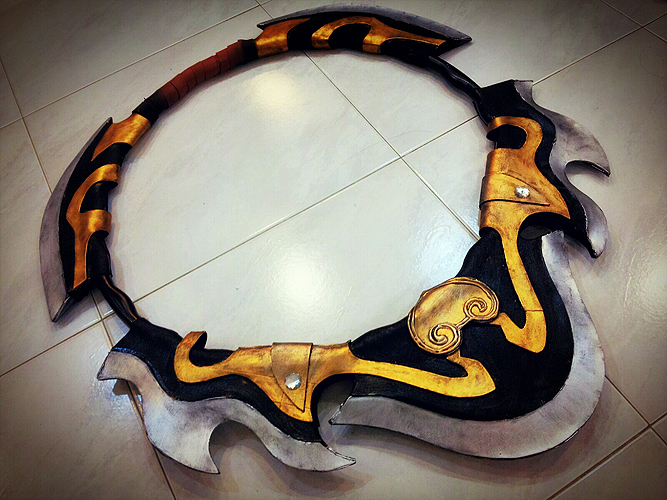
Managed to set aside some time over the weekend to finish up my SSX chakrams, as well as get started on some small accessories to go with the costume. In my opinion the chakrams took waaaay too much time, I was hoping for it to be a simple project, but alas ;_;
Those chakram/wind&fire wheel things are a LOT more tedious than I expected. I originally wanted to just wrap pieces of craft foam around hoola hoops, but then I decided I wanted them to look heavier and chunkier, if that makes sense. They're also supposed to be quite big, so they need to be convention-safe, as much as I hate screaming kids running around at events and want to take their heads off..... no. 8( 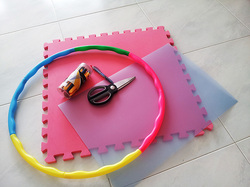 I ended up using foam, still, but instead of normal foam sheets I used heavy eva floor mats leftover from my Sice Scythe. Hoops were from Daiso at $2 apiece. The wonderful thing about these is that can be dismantled and assembled again, for ease of transport. They were a little too large so I removed one section from each of the hoops (hence the lonely green piece on the hoop in the photo LOL). I also used PP sheeting, you'll see why later.
 Recently I've been trying to cut down the amount I spend on costumes. As such, I'll be keeping track of the cost of each new costume here.
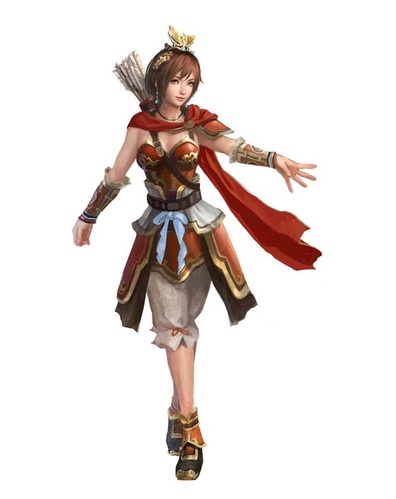
I'm currently working on Sun Shang Xiang's Rot3K DLC costume for DW8. I love that it's way more oriental than her contemporary default outfit, and is more faithful to her tomboy war-princess image.
Also I love Rot3K.
Anyway, I've set a budget of 30SGD for this, seeing as I have a lot of scrap leftover fabrics from previous projects that I can use, and I'll only need to spend on materials for the props and accessories.
Besides her default fire wheels, I also wanted to make the bow and arrow set that she uses in her second musou attack. She has a quiver full of arrows slung across her back in this artwork anyway, so it would be kind of stupid to not have the bow, really.
The materials for the bow and arrows cost me $12. Everything (except scrap pieces of craft foam, and paint, which I already had on hand) was bought from Daiso, a place more glorious than the fields of Elysium, where every single item costs only 2SGD.
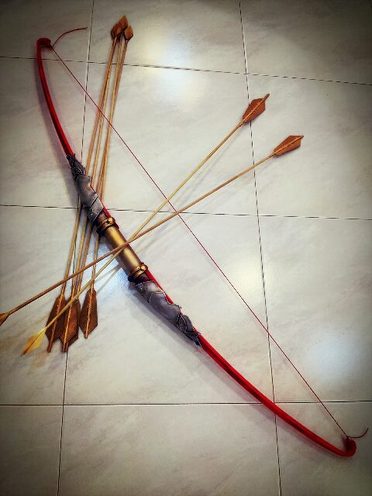 The base structure of the bow comprises two long plastic shoe horns, and a wooden dowel in between them. Other extranous details are just layers of craft foam, raised hotglue borders and scrollwork, and acrylic gems. The bowstring was just some random.. uhh, string.. that I found lying around the house.
The bowstring is entirely non-elastic, as the tension has to come from the bow being bent and drawn, rather than the string. The bow is functional in that there's enough tension to actually shoot an arrow, though not very far LOL. Since the joints between shoe horn and handle would be taking a lot of stress, I had to reinforce them by drilling through both shoe horn and the wood, and inserting a dowel, and applying copious amounts of hot glue.
The arrows are made from thin wooden dowels, and tipped with craft foam arrowheads. I originally intended to fletch the arrows with feathers, but upon discovering that Daiso only sells down feathers instead of quill feathers, I beat my chest and wailed and cried and threw a great big tantrum and kicked a trash can over and flung myself into a river and decided to use craft foam instead.
With those out of the way, I find myself left with 18SGD to play around with. I've gotten started on the bracers and pauldron, which cost me nothing at all because I already have a lot of excess craft foam lying around. Hopefully I'll have the discipline to finish them before the week is over. Spraypainting is such a hassle, and my can of red spraypaint seems to be running dangerously low. Moneyyyy.
Thought I’d write a bit about this project. I don’t think my work is good enough to write tutorials on, but I’ll just try to explain what I used for this prop and how I used them, and hopefully that might give you guys some ideas that you can use for your own projects.
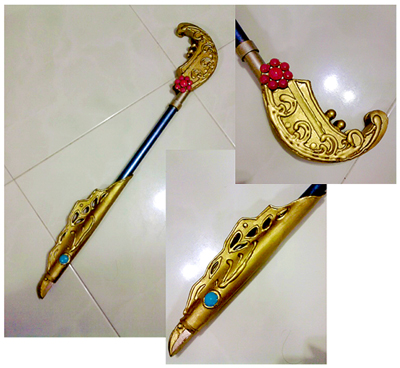
This took a way shorter time to complete than I expected. I basically sat down one night and finished it in a sitting, and spraypainted it the next day. The entire thing was made from extremely cheap leftover materials that I had lying around in my workspace – craft foam, foamcore, plastic sheeting (PP board from Daiso), acrylic gems, a length of PVC pipe, and a LOT of hotglue. It was quite difficult to make out the exact details of the flute, but I was pretty sure the design is supposed to be inspired by a bird of some sort (a phoenix or peacock, perhaps).
The ‘head’ portion of the flute was a sheet of craft foam cut to shape and moulded around the pipe, and the (idk what) designs cut out with a craft knife. The ‘beak’ was carved out of foamcore, primed, and pushed into the mouth of the pipe. The other end of the flute was cut from two pieces of foamcore coated on all sides with PP sheeting, with the pipe sandwiched inbetween and glued into place.
The rest of it was just fine detailing, which I used a combination of acrylic gems, beads, and hotglue for. Be careful when drawing stuff with hotglue. Work very very very very very slowly and don’t be kanchiong (don’t panic or be hasty). Practice on a scrap piece of foam or plastic before you work on the actual thing.
Spraypainted the entire thing gold, and then painted the handle a dark, dappled blue. I just went over it using a stippling motion with a dry brush, it gives this lovely textured effect, with a little of the gold base showing through. Being the failed loser that I am, I didn’t have sky blue and pink acrylics on me, so I ransacked my store of nail polish and painted the gems with that. Yay.
|


 RSS Feed